Preventing frustration is just one of the key reasons teams need to understand their user journey. Knowing everything that happens between your product and its users helps your team make faster fixes and better product developments.
Story maps are a visual approach to backlogs, making it easier to see how users interact with your product. They’re also a great way to sort out which developments to prioritize.
Story maps help you:
Map out user actions within your product
- Understand what users are experiencing
- See which areas of the project will be the most challenging to develop
- Understand what is required with new product versions
This new level of insight will help you get on the same page with your team, helping you create a better product development experience–and a better user experience, too.
What story maps are (and why they beat backlogs)
Story mapping is a tool that lets you visualize the user journey. User story maps show each step your customers take while using your product.
You may already know that backlogs are an important part of managing projects in Jira, but the backlog format (a long list) often makes it difficult immediately see what’s going on in the project. That’s especially true once your list of issues starts growing and you keep adding new versions of your product.
That’s precisely where story mapping comes in: story maps are a visualization tool for backlogs.
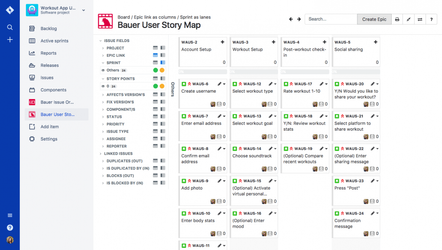
User story maps are a set up as swim lane flowchart. There is a backbone of user activities along the top of the chart, and underneath each of those activities there will be a list of all of the related sprints and versions.
In the Bauer User Story Map add-on, a story map will look something like this:

Getting started with your first story map
For your first user story map, first consider how users interact with your product. These high level user activities form the backbone of the story map, illustrating what users will accomplish while using your product. Let’s say your team is developing a mobile workout tracker. Your user flow may look something like this:
- Account setup
- Workout setup
- Post-workout check-in
- Social sharing
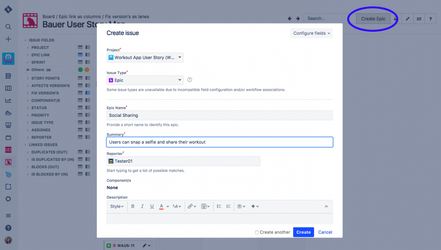
To get started with user story mapping, it might make sense for you to create an Epic for each of the above processes. You can do that right in our add on, using the “Create Epic” button. Then a window will open up, where you can add the details:

As you add Epics and Stories, they will automatically appear in your user story map.
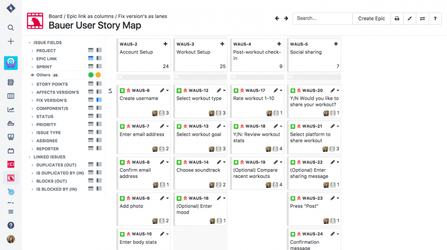
By using Epic Links as the header row, or backbone, in the Bauer User Story Map add-on, you can then organize your rows to show sprints or product versions:

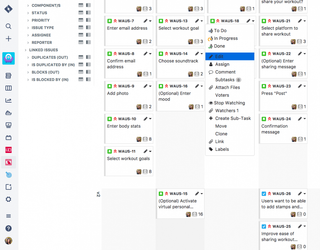
As your project develops and changes, you can easily rearrange the epics using drag and drop, and rename or edit user stories straight in the add-on:

Ready to improve your user flow and facilitate better brand communication? Give Bauer User Story Map a try on Jira or Visual Studio. Download the add-on for Jira Server or subscribe for Jira Cloud from the Atlassian Marketplace.
Enjoy setting up your first user story map! If you have any questions along the way, our support team is here to help.